Making the tools for aiglets.
Making a burnisher
Making aiglets has to begin with making the tools you need. Without quality tools, it will be impossible to consistently make quality aiglets.
You may want to purchase new supplies for your tools but old and used supplies work just as well.
The first thing you want to make is a burnisher because you will need that to form your pattern and all of your aiglets.
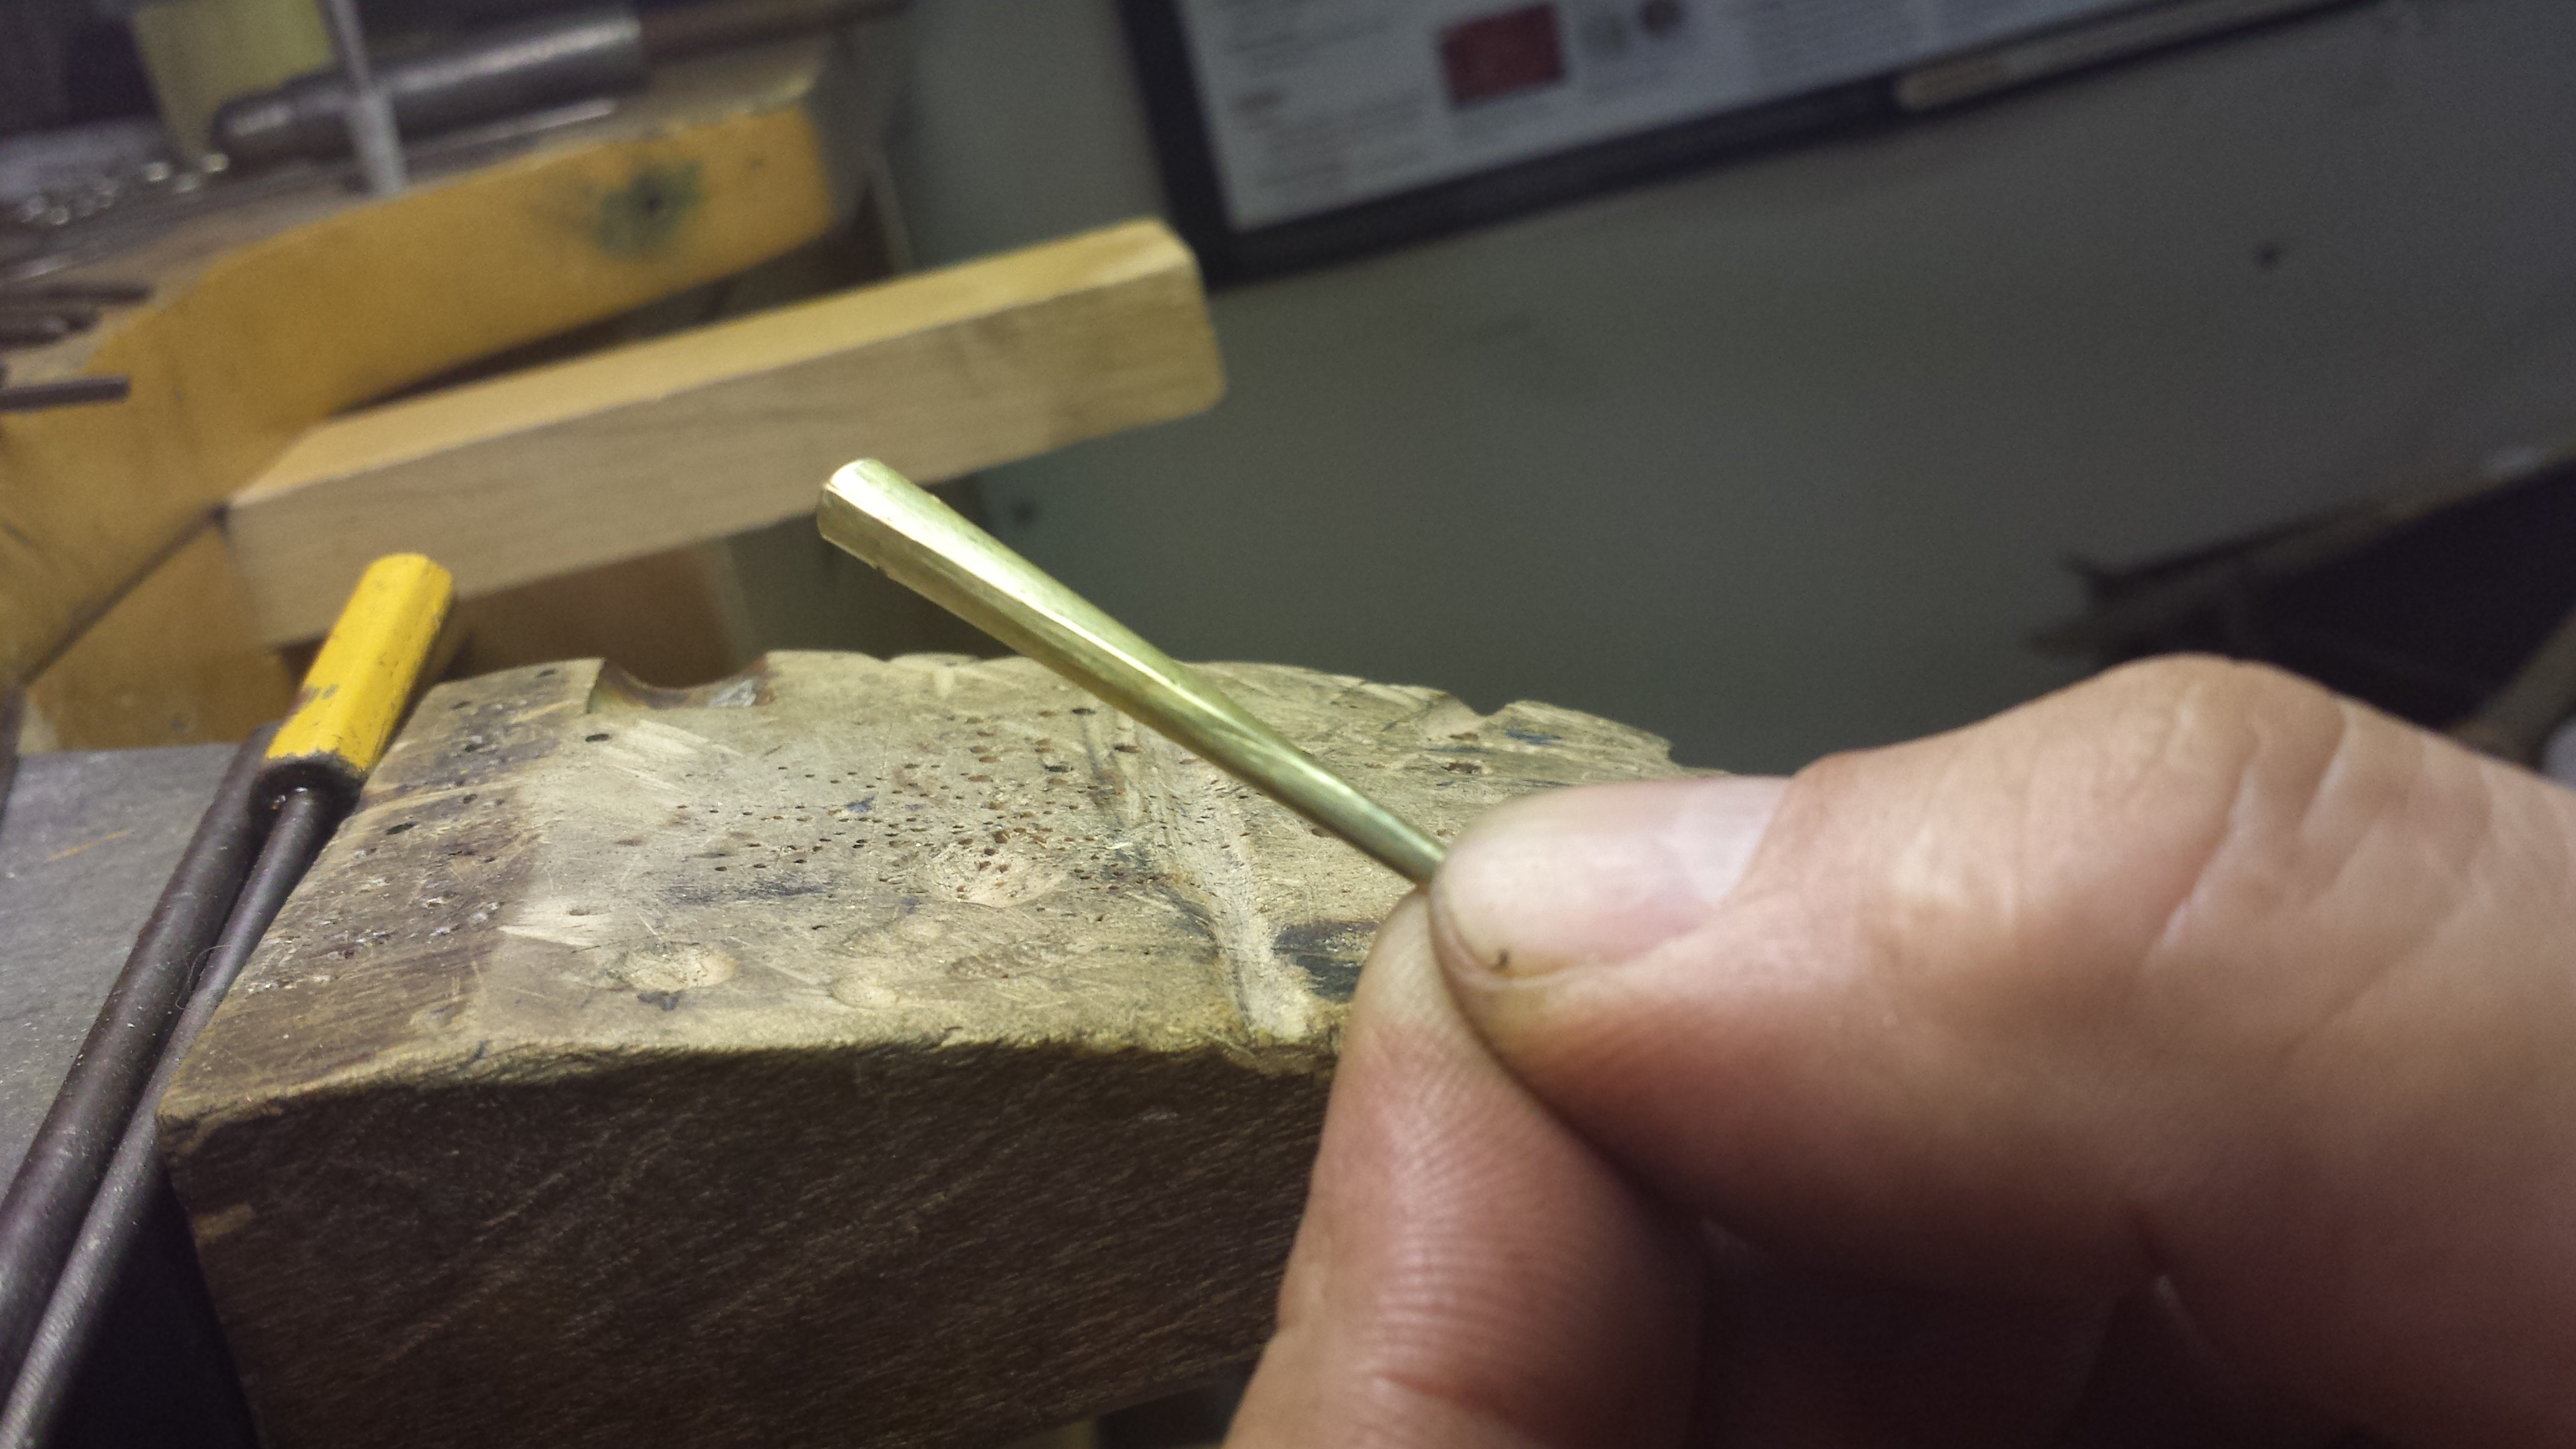
You want to obtain a 'Square Head Bolt' with a 1/2 inch to 3/4 inch square head. A brass bolt is what you want as my experience with a mild steel bolt, no matter how polished, leave marks that need to be polished out later. These may be found at any hardware store, but most likely you will need to order them online after a search. Make sure you get one with enough length so that you can mount it into a piece of wood dowel as a handle.
When you are at the hardware store shopping for a bolt, remember to pick up a set of small needle files.
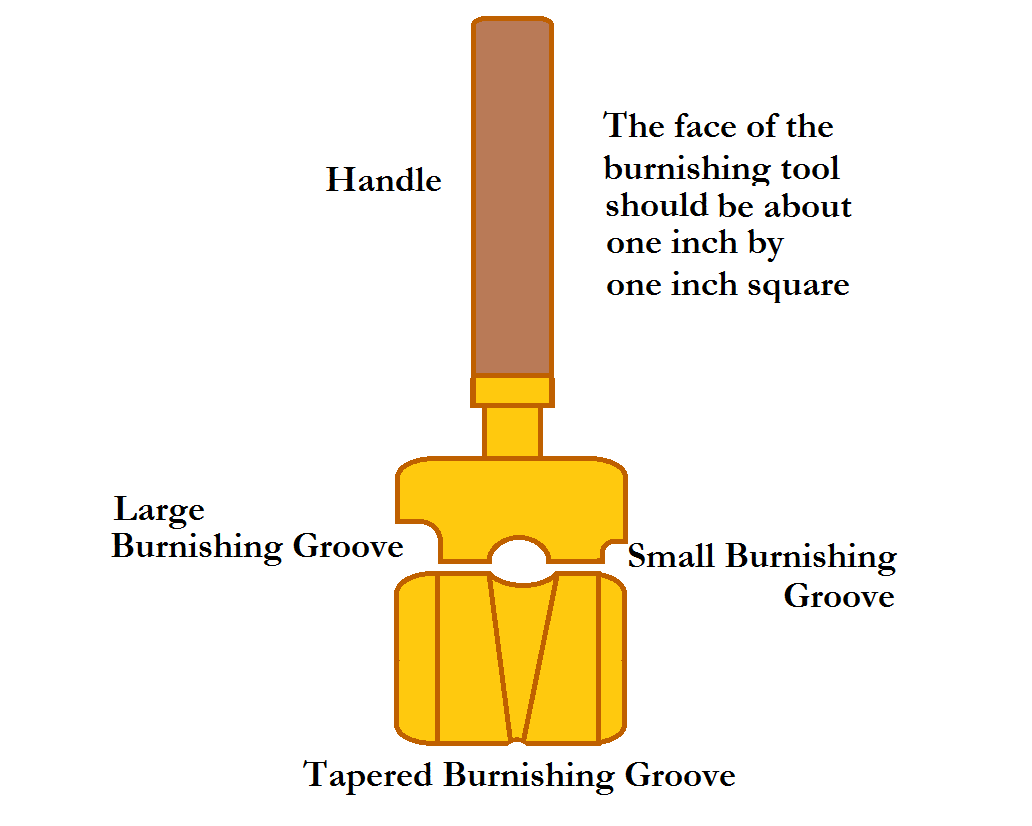
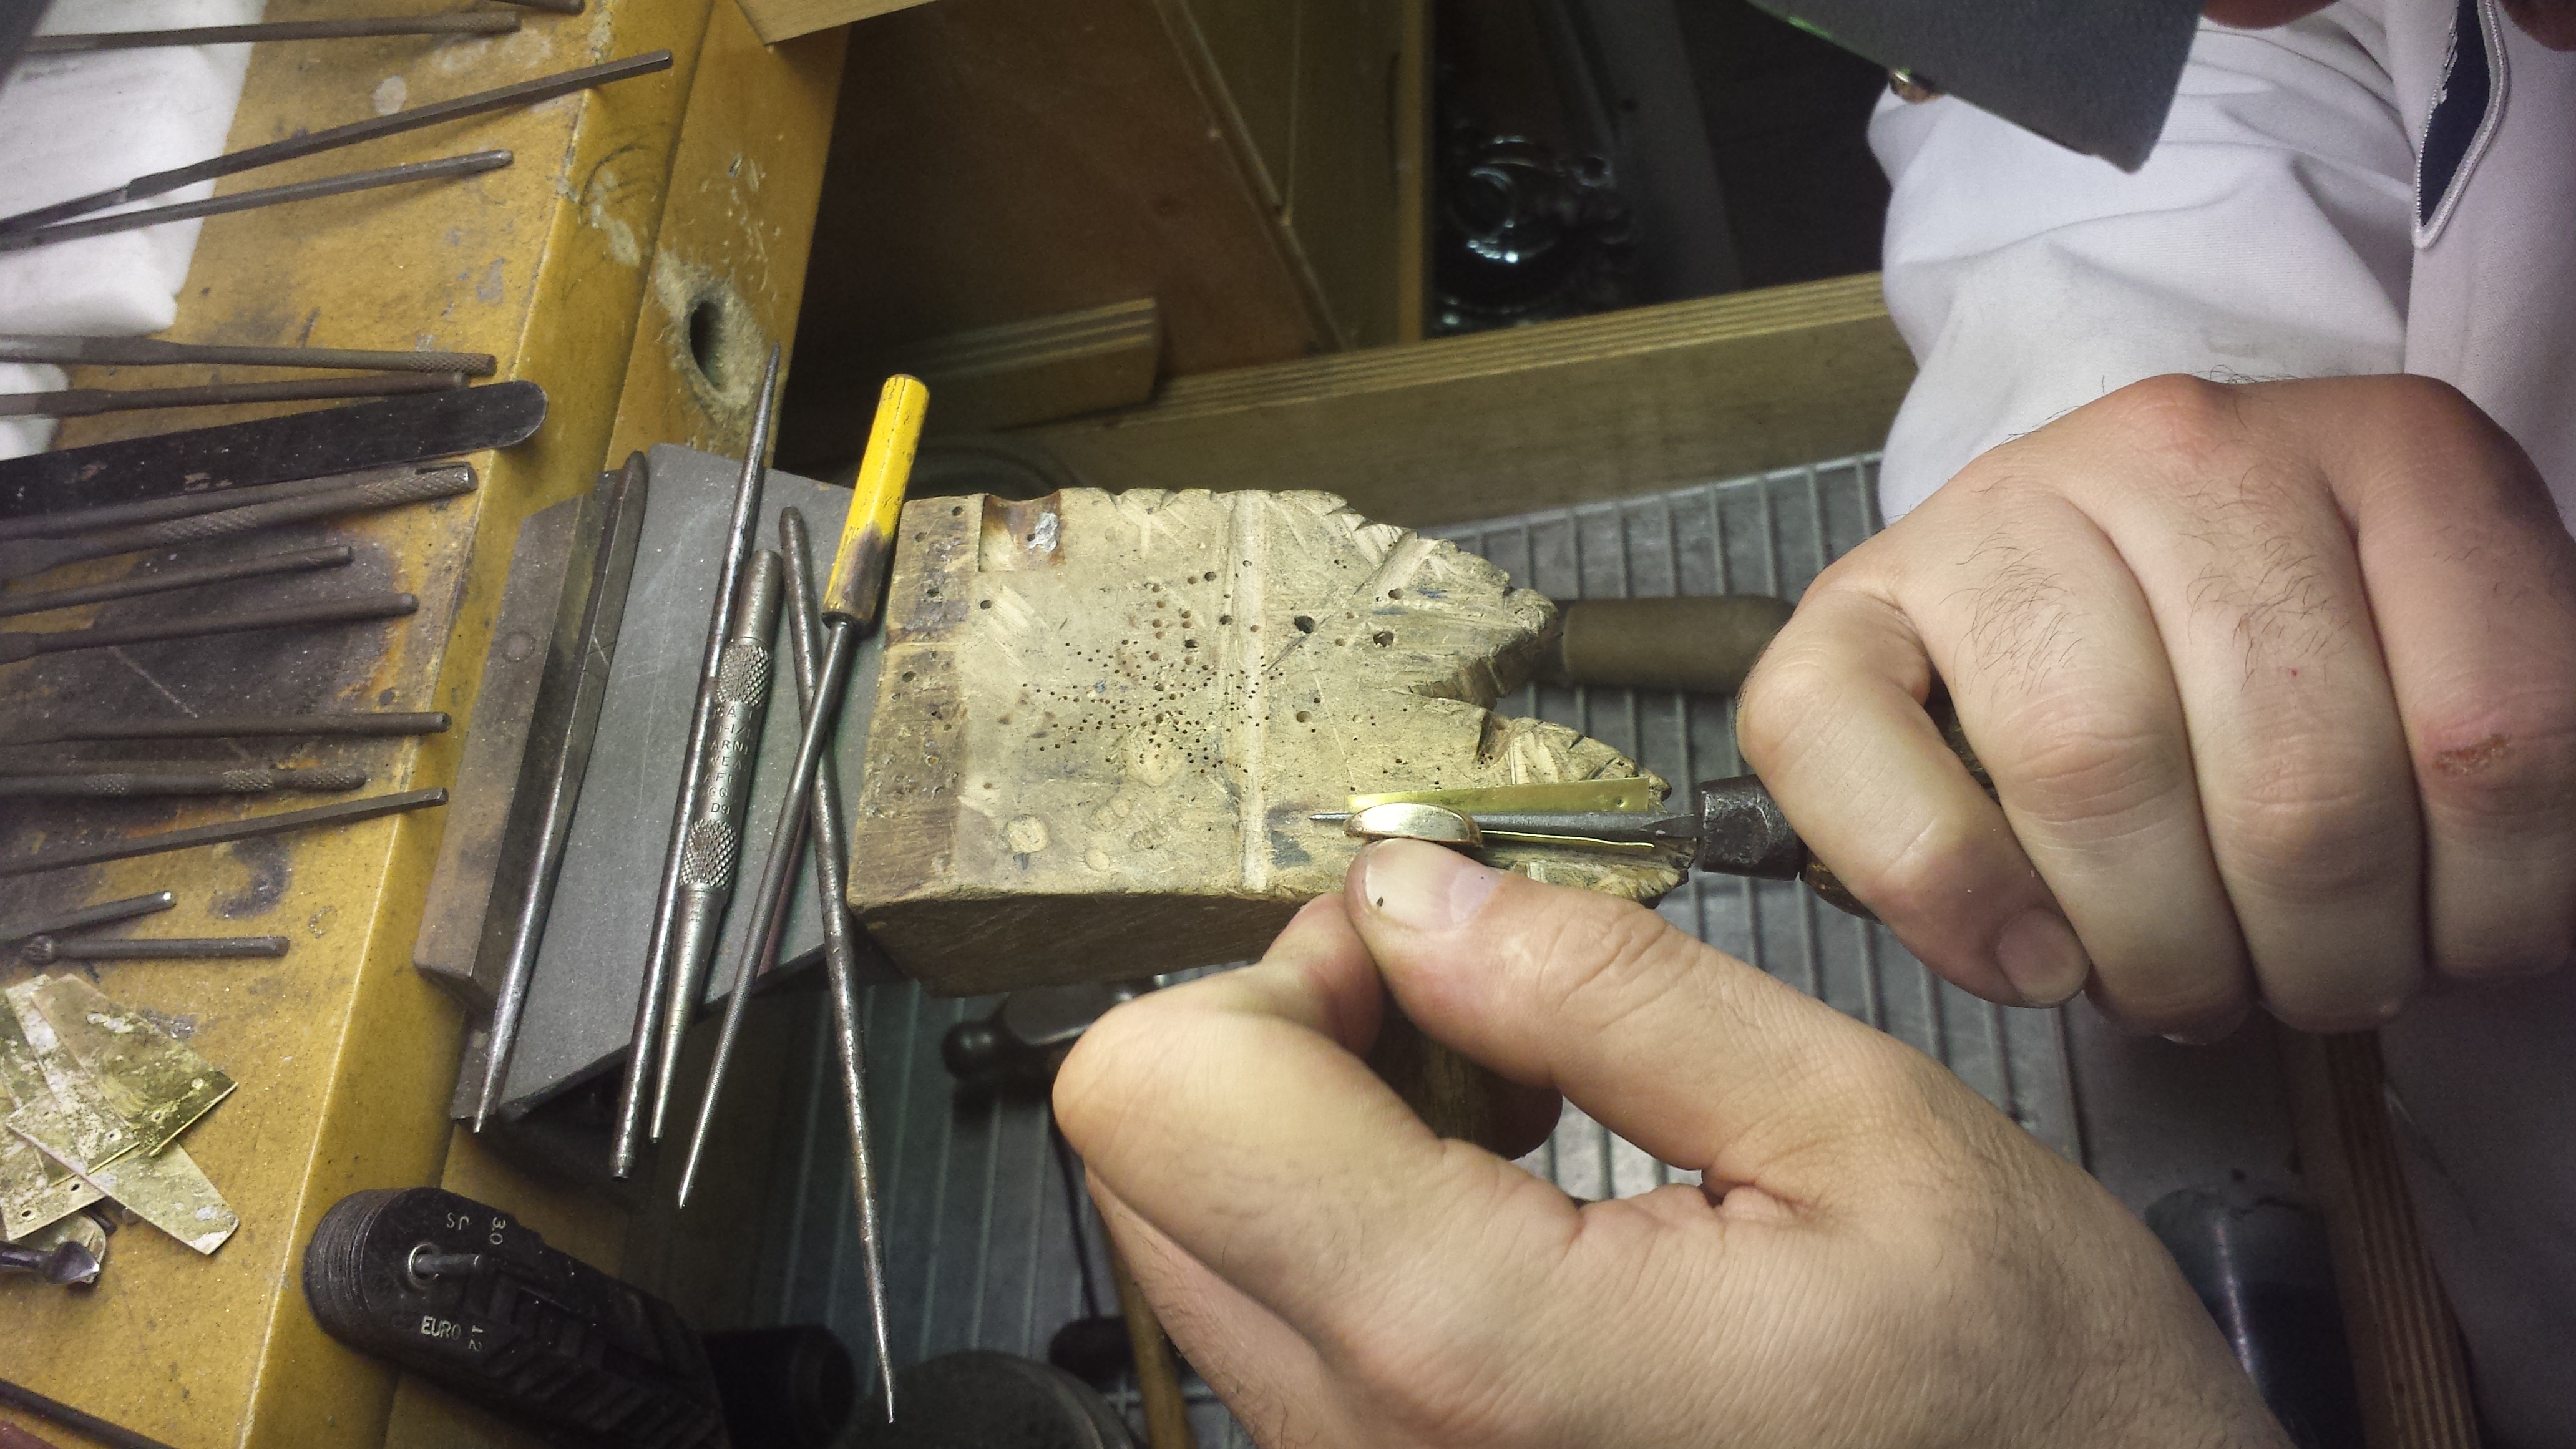
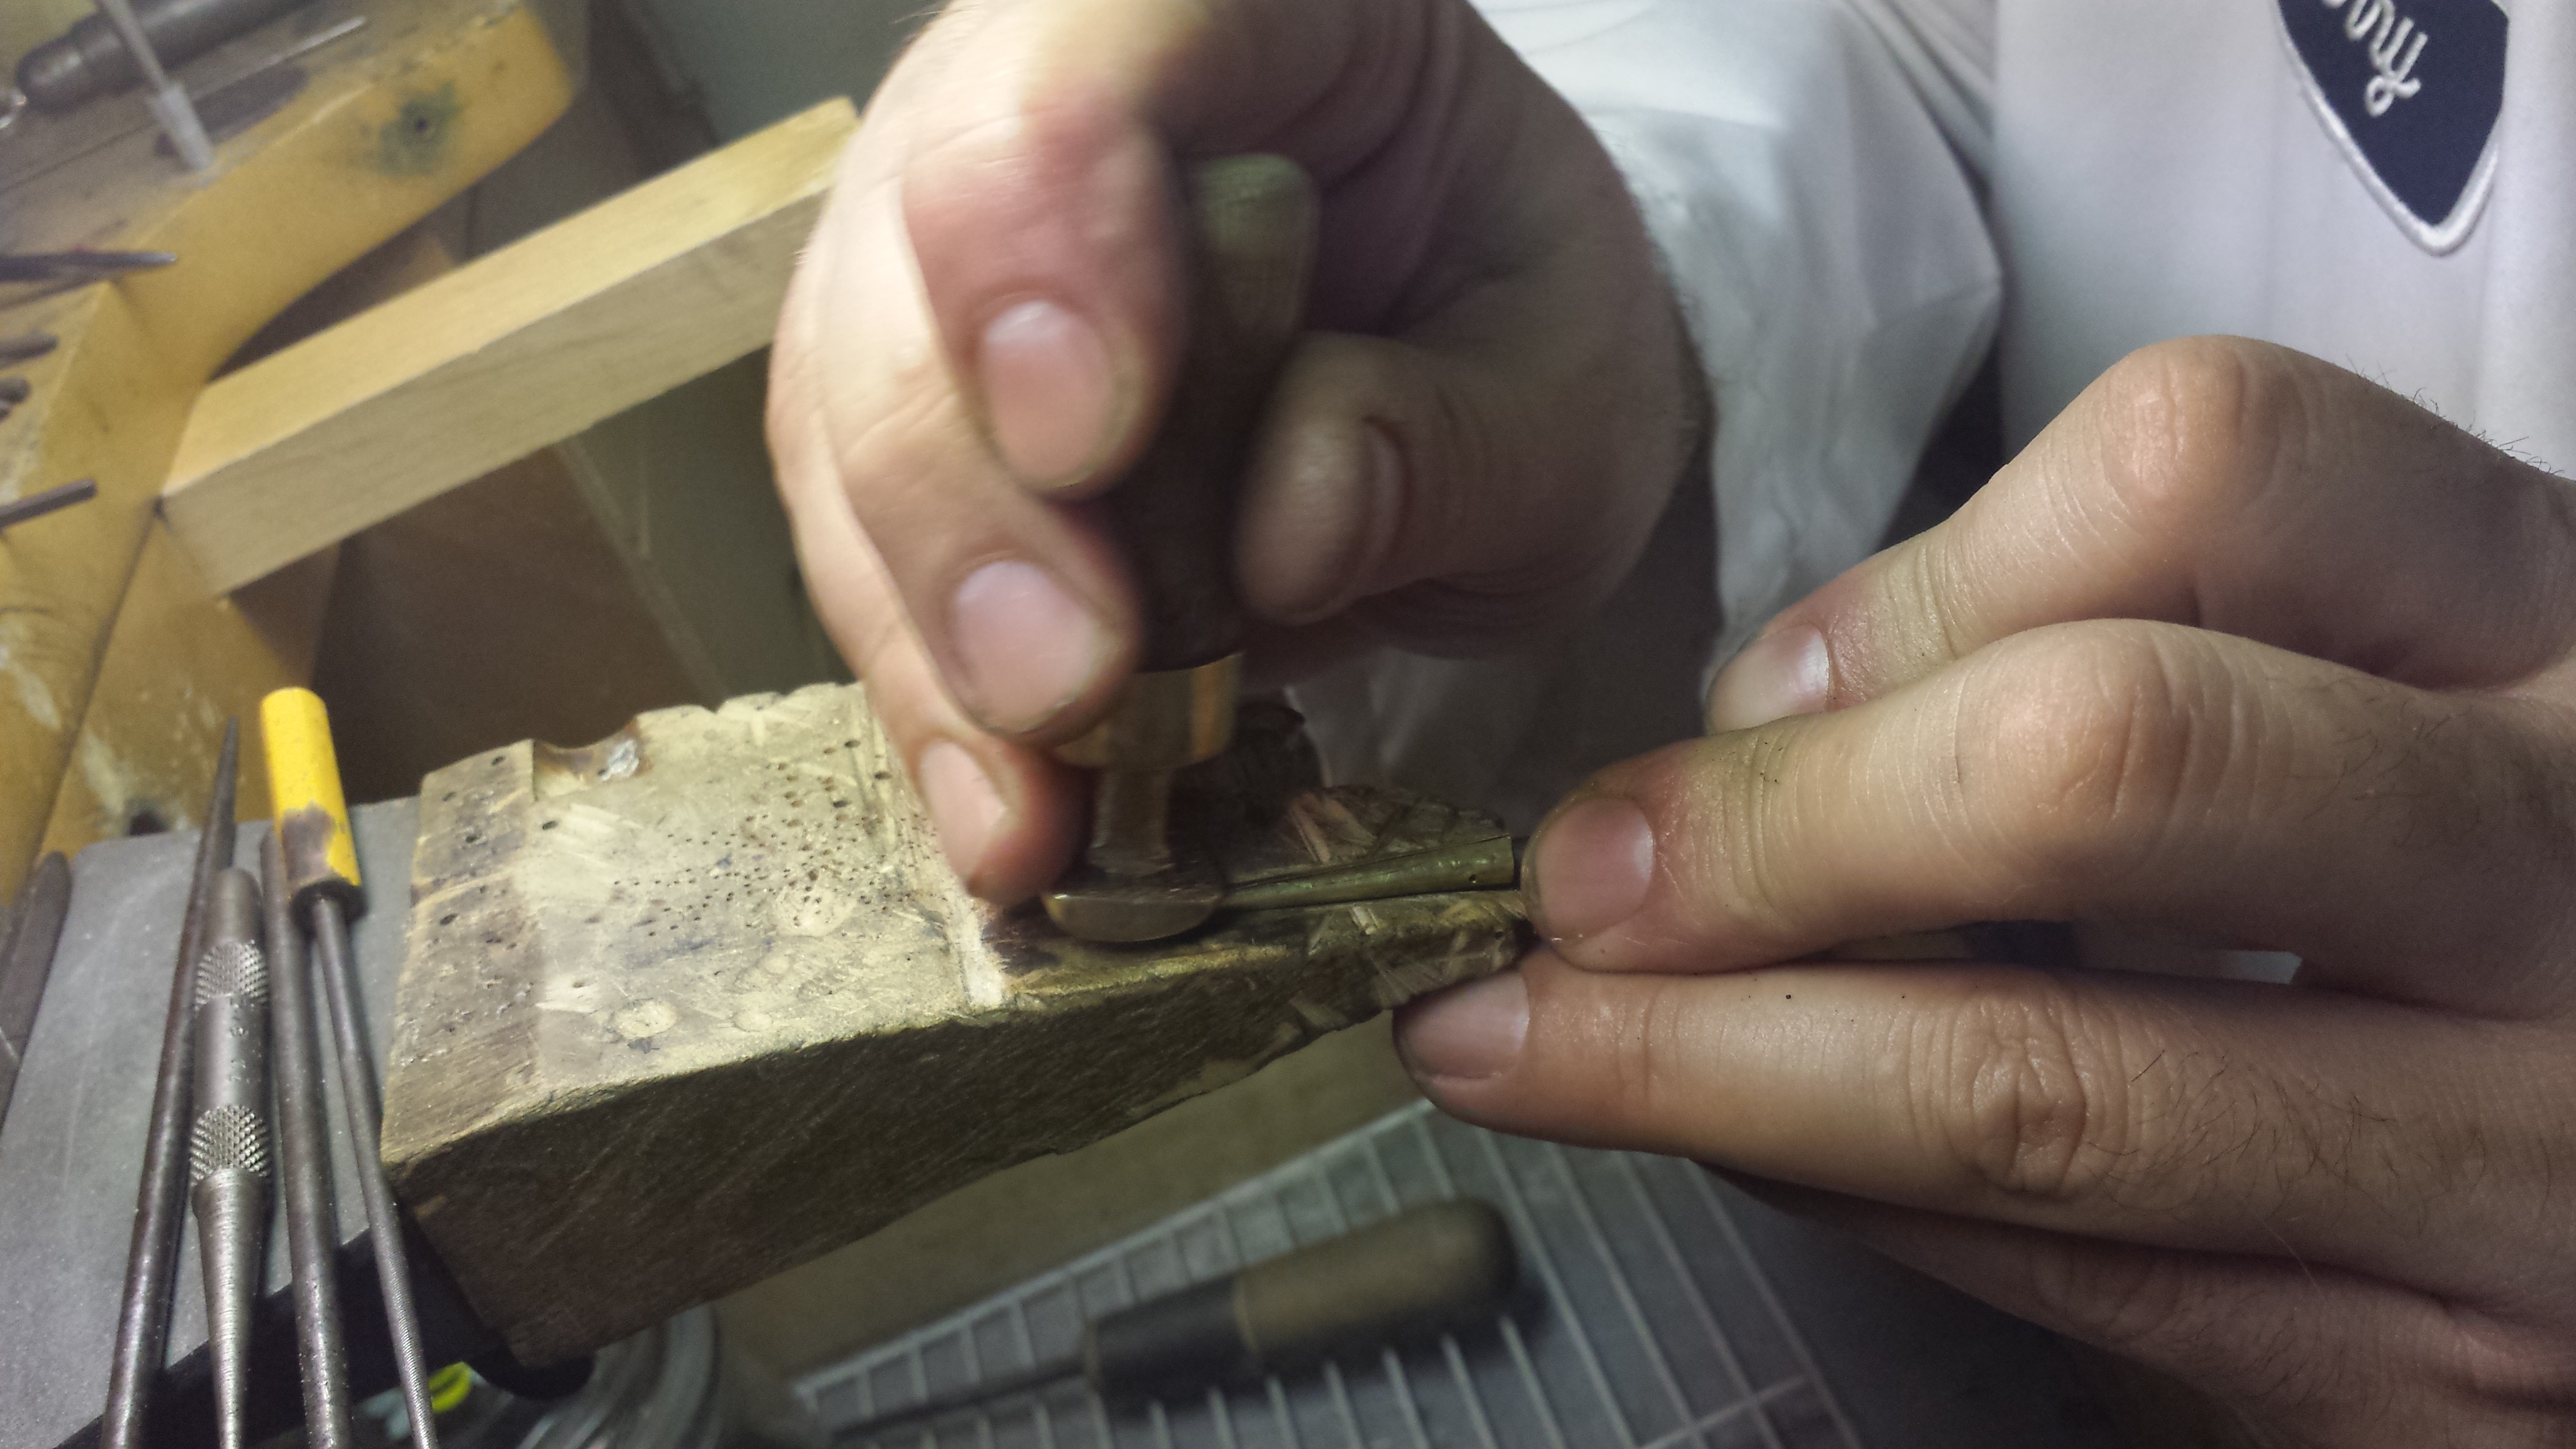
You will want to hold the bolt in a vise so you can work on the top. Start by making a small quarter circle groove on one side with a file. You should use a file that is about 1/8th of an inch across and no larger. Once you have the small groove filed in, repeat with a larger file on the other side. Use a file that is 1/4 inch in diameter for this larger groove.
The center groove will be the hardest to form as it will be small at one side and large at the other side. Start by making a shallow groove with your smallest file across the face of the bolt. This is the small end. Take a larger file and file at an upward angle to form the shape of the other end. Once you have the ends about how you like them you now need to made a smooth section of a cone between the two places where you have started filing. Keep an eye on the drawing and try to copy that as much as possible.
After you have the grooves cut, you will need to start sanding with finer and finer grits of sandpaper until the metal has no visible scratches and has no sharp edges.
This part can be made much easier if you have a dremel tool to do the cutting and polishing. After you have it polished, make a handle that is about 4 inches long. A longer handle is better because if it is too long, you can shorten it. It is much harder to add to a handle.
Some images of making a burnisher from a brass bolt
Making a mandrel
Start making a mandrel by finding an icepick. New or used, it does not matter. The first thing you need to do is to lay the pick flat on a table and see how much the tip curves.
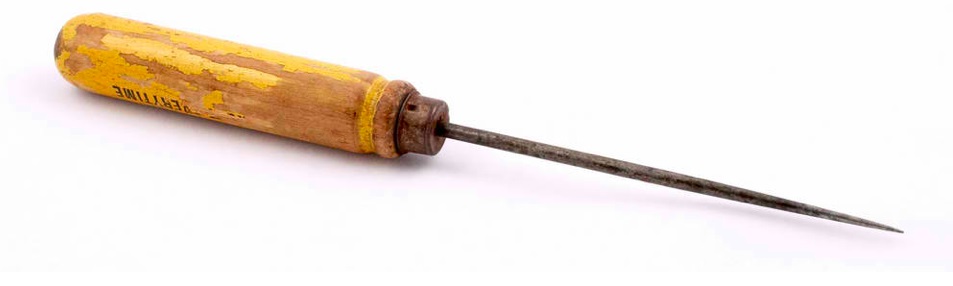


In my experiance, all of the ice picks I have seen have a slight curve in the last inch or so near the point. It is this curve that you need remove. The last couple of inches need to be a flat line to the tip. If there is a curve, then when forming aiglets you will be burnishing them in two directions and that makes it very hard to make consistently shaped aiglets.
You can shape the end by sanding and spinning the end on a piece of sandpaper that is laid flat on a table. Or you can use a belt sander.
When you are done the last couple of inches should be a uniform flat sided cone that comes to a point. You will want to take that sharp point off as it will not be needed. (If you leave it, at some time you will end up needing band-aids and tissues to clean up the spot where you stuck yourself.)
Making your pattern
Once you have the mandrel made, you will want to lay it on a strip of masking tape like the image to the right. A thicker tape works better here as you will need to peel it off the mandrel in one piece later
Carefully, without wrinkling the tape, roll the tape around the mandrel until the tape is covering half of the metal. Using a new razor blade, trim the tape so the line you cut is in line with the center of the mandrel. This may take several tries to get it right. Once you have one half of the tape covering the mandrel, repeat this process with the other side of the tape.
When you have the tape covering the end of the mandrel like the picture on the left, you can very carefully peel the tape from the mandrel. Put the tape on a piece of paper and trim the top so it is flat and trim a very slight bit off of the bottom.
What you want to be looking at now is a trapezoid that is much taller then it is wide like the image below.
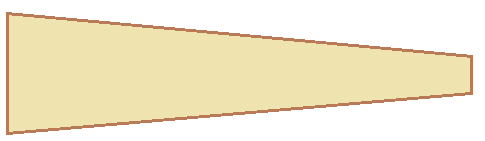

What you are looking for is a pattern like the above image. It may take a few tries to get there. You want to start by tracing your pattern onto an annealed piece of 30 gauge brass. Take a good set of metal shears and carefully cut the pattern out (Do not add the holes for the rivets yet).Make sure you cut right on the lines you scribed.
I could write extensive instructions on how to make an aiglet but I am going to refer you to a video I made of the process. The first half of the video I make an aiglet that is about 1.5 inches long. To be prefectly honest, you can't see much because the aiglet is so small and my hands cover most of what I am doing. So the second half of the video I make an aiglet that is 10 inches long. You can clearly see what I am doing. With the description during the first half, and the additional repeat of information on the second half of the video, you will find it useful to watch.
This video will show you how to take a flat piece of brass and form a completed aiglet. This video works on the assumption that you have already made a mandrel, pattern and have cut out some blanks.The video entitled "Making Aiglets" is available on YouTube at this address: http://youtu.be/yq9wke1Ot5s
Now that you have watched the video, time to make your pattern. Most likely the first one will either be too large, meaning you will need to flatten your metal blank and file it so it is the right size. Or it will be too small and you will need to cut another black by tracing your pattern again. Keep forming the pattern, flattening and reshaping until you have an aiglet that has the two sides that just touch along the entire length of the aiglet.
This will also give you a great lesson in how much harder it is to form an aiglet out of hardened metal.
Once you have a brass aiglet that is correct, file the top flat as well as the bottom. Flatten the blank and put in either two or 4 small holes to mark where you will punch holes for the rivets. These do not need to be large, just enough for a punch to make it through to the metal under the pattern. (Some aiglets had two rivets holding them to the cords they were attached to.)
Make sure you mark the pattern in some way that it is obviously a PATTERN! If you accidentally use your pattern and it gets mixed up with other aiglets, you get to do the entire pattern making part again.
Additional items
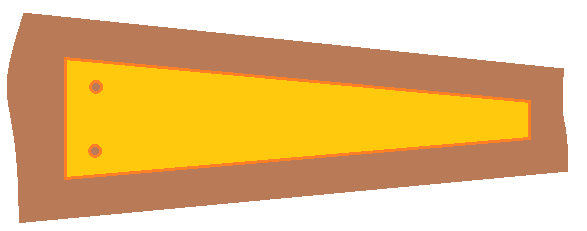
I should remind you to use your paper pattern and cut a piece of thin leather slightly larger then your aiglet blanks. This will keep you from cutting your hands when you are bending the aiglets around your mandrel. The leather should look like the image below with an aiglet blank sitting on it.
This will definitely save your hands from wear and tear.
The other tools you may need are a flat bench block of metal to hammer on, a rawhide mallet, a small brass hammer, a sanding stick and some sandpaper. a section of 4X4 post about 6 inches long (or a bench pin), with some shallow grooves to use as a place to use as a place to form your aiglets.